इवेंट रिपोर्ट
Latte Art Basics for Beginners
Latte art is a key part of the coffee experience for many enthusiasts. If you’re interested in creating your own designs at home, this beginner-friendly guide will walk you through the essentials. With the right tools and a bit of practice, you can start making café-style drinks yourself.
Vincent Hale
रिपोर्टर
डेस्क नोट
नीचे आयोजन की पूरी रिपोर्ट और महत्वपूर्ण अपडेट पढ़ें।
डेस्क
ग्लोबल इवेंट
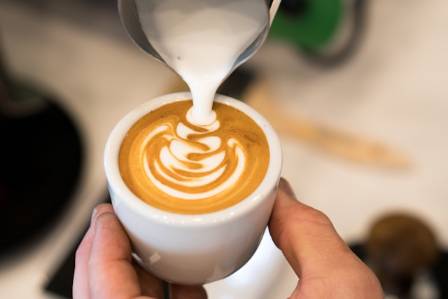
Latte art is a key part of the coffee experience for many enthusiasts. If you’re interested in creating your own designs at home, this beginner-friendly guide will walk you through the essentials. With the right tools and a bit of practice, you can start making café-style drinks yourself.
What Is Latte Art?
Latte art refers to the patterns formed on the surface of coffee using steamed milk foam. To achieve these designs, milk must be properly steamed to create a smooth, velvety microfoam. This foam sits on top of the coffee instead of mixing in, allowing visible patterns to form.
What You Need to Get Started
A Coffee Base
You can use espresso or similar drinks like matcha or hot chocolate, as long as they are concentrated and not overly diluted. While an espresso machine is helpful, it’s not required—you can use tools like a French press if the base is strong enough.
Milk
Whole milk tends to produce the best results, but alternatives like oat or soy milk can also work well. Almond milk is generally more difficult to foam and may not give consistent results.
A Metal Pitcher
A milk jug with a pointed spout helps control the flow while pouring. Beginners often prefer smaller pitchers that feel easier to handle.
A Frothing Tool
This could be a steam wand or a handheld frother to create the foam.
A Cup or Mug
Any coffee cup will do, as long as it’s comfortable to pour into.
How to Make Latte Art
Start by preparing your drink base in a cup. Pour milk into your pitcher and begin steaming or frothing. Move the wand or frother slightly up and down—when it’s closer to the surface, more foam is created. Be careful not to bring it too high, or you’ll introduce large bubbles.

Understanding Milk Foam Types
There are three common foam styles:
very thin, created by keeping the wand deeper in the milk
medium thickness, made by frothing near the surface
thick and airy, formed by staying near the surface longer
For beginners, latte-style foam is easiest to work with. Very thin foam disappears quickly, while very thick foam can be hard to pour evenly.
A good latte foam should look glossy and smooth, with minimal bubbles. If it appears watery, it’s too thin. If it looks overly airy or foamy, it’s too thick.
Preparing the Milk for Pouring
After frothing, gently tap the pitcher on a flat surface a few times to remove large bubbles. Swirling the milk also helps create a consistent texture.
Hold the pitcher in your dominant hand and tilt the cup slightly with the other. For better control, grip the handle with three fingers and stabilize the spout with your thumb and index finger.
Pouring the Design
Begin pouring from a higher position using a gentle circular motion to combine the milk and coffee. At this stage, patterns won’t appear yet.
Once the cup is about one-third full, lower the pitcher closer to the surface. This allows the foam to sit on top and form designs.
Start with a Simple Pattern
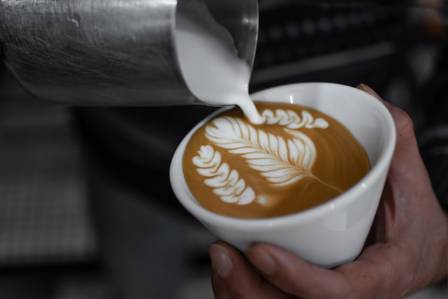
The heart is a great beginner design. To create it, pour near the surface and gently push the milk forward in a straight line. This basic motion is also the foundation for more advanced designs like rosettas and swans.
If your design doesn’t come out perfectly, you can use a toothpick to adjust or refine the shape.
Practice and Alternative Methods
Mastering latte art takes time, so don’t get discouraged. Repetition is the key to improvement.
If free-pouring feels challenging, you can also try stencil art. Simply place a stencil over your drink and sprinkle cocoa or powdered sugar to create designs.
Final Thoughts
Your first attempt might not look perfect—and that’s completely normal. With consistent practice, your technique will improve, and you’ll be able to experiment with more intricate designs. Keep practicing, stay patient, and enjoy the creative process of making your own latte art at home.
संबंधित अपडेट

· hi
आपके घर में पौधों और हरियाली के 5 स्वास्थ्य लाभ
गोपाल

· en
Top 10 Seafood Platter Ideas to Try
Mia Rose
· hi
रचनात्मक रजाई बनाने की कला: एक व्यापक मार्गदर्शिका
दिपान्विता सेन

· hi
होपटाउन हाउस
धनुष

· hi
बाह्य अंतरिक्ष के चमत्कारों के लिए एक गहन मार्गदर्शिका
श्वेता रस्तोगी
· en
A Beginner's Guide to Spherical Robots
Elena Vance