इवेंट रिपोर्ट
Beginners guide to sculpting in clay
Working in three dimensions can be a rewarding creative challenge. This beginner-friendly guide simplifies the process of making clay sculptures into clear, manageable steps.
Nathan Brooks
रिपोर्टर
डेस्क नोट
नीचे आयोजन की पूरी रिपोर्ट और महत्वपूर्ण अपडेट पढ़ें।
डेस्क
ग्लोबल इवेंट
Working in three dimensions can be a rewarding creative challenge. This beginner-friendly guide simplifies the process of making clay sculptures into clear, manageable steps.
Sculpting with clay is a fantastic way to explore your artistic side. However, if you’re just starting out and want to create sculptures at home, it can feel overwhelming at first. From selecting the right material to developing your skills, the following tips will help you get started with confidence.
Choosing the Right Clay for Sculpting
Before beginning your project, it’s important to select a suitable type of clay. Different options offer unique properties and finishes:
Oil-based modeling clay is often less refined and not ideal for fine detail, but it remains soft and reusable, making it great for practice.
Polymer clay is also easy to shape and can be hardened in a standard oven, though it may crack if not handled properly.
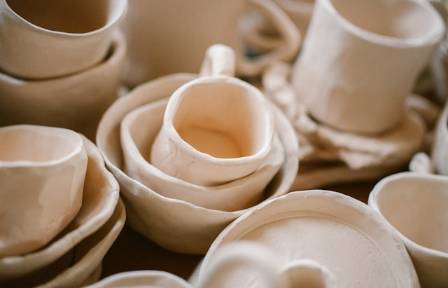
Water-based (ceramic) clay can be molded and then fired at high temperatures to become solid, commonly used for pottery and household ceramics.
Best Clay for Beginners at Home
Among these options, water-based clay is usually the best choice for beginners. While it is often used on a potter’s wheel, it can also be easily shaped by hand, making it ideal for learning basic sculpting techniques.
Getting Started with Clay Sculpting
Once you’ve chosen your clay, it’s time to start creating. Working in three dimensions may take some practice, but these tips will help you build your skills step by step.
Visualize Your Final Piece
Before you begin shaping the clay, have a clear idea of what you want to create. Sketch your design from different angles and consider proportions and overall size.
If your sculpture will be displayed at home, think about the main viewing angle. Even if it’s not perfect from every side, it will still look effective from its primary perspective.
You might also consider making a relief sculpture. Since it’s built onto a flat surface, it doesn’t need to be viewed from all sides and is easier to manage in terms of balance and weight.
Check the Moisture Level
Proper moisture is essential for workable clay. Dry clay can crack and is difficult to shape.
To test it, roll a small piece into a cylinder about 1 cm thick and 10 cm long. Bend it gently—if it bends smoothly, it’s ready to use. If cracks appear, add a little water and knead it again.
Build Forms Effectively
Even without a potter’s wheel, you can create strong structures using simple methods.
Roll clay into coils and layer them to form hollow shapes.
Use your fingers to pinch and hollow out areas, creating depth and curves.
These techniques help maintain structure and prevent collapse.
Avoid Unsupported Extensions
Beginners often want to create figures with extended limbs or complex shapes. However, these usually require internal supports (called armatures), such as wire or metal rods, to hold the structure.
For now, focus on simpler, compact forms. Once you gain more experience, you can experiment with adding armatures to support more advanced designs.
Learn from Local Studios
While practicing at home is valuable, some techniques—like firing clay or refining advanced forms—are best learned with guidance.
Consider joining a local workshop or studio. This not only improves your skills but also gives you access to equipment needed to finish and preserve your sculptures.
With patience and practice, clay sculpting becomes an enjoyable and expressive art form. Start simple, experiment often, and gradually build your confidence as you bring your ideas into three-dimensional form.